
A ferry terminal needs something on its waiting-room wall. A photo of the lighthouse outside would give players a glimpse of where the ferry is headed. You have the shot on your iPhone, but the file on your computer ends in .heic, and it doesn't appear when you try to import it into Roblox Studio.
Studio accepts PNG and JPEG images. If your photo already arrived as a JPEG, go straight to the crop. If you have a HEIC, make a PNG copy first. Here's how to get from the camera roll to a poster that looks right from the waiting-room door.
Convert the HEIC photo to PNG
- Keep the original photo so you can try a different crop later. Open HEICHub’s HEIC to PNG converter.
- Drop the HEIC file onto the page and choose Convert to PNG. The converter processes the photo in your browser.
- Download the PNG, open it in your image editor, and check that the horizon runs the right way up before cropping.
Changing the extension in the filename leaves the HEIC data inside. If you've already renamed the file and Studio still skips it, go back to the original and run the conversion.
Crop for the wall where the poster will hang
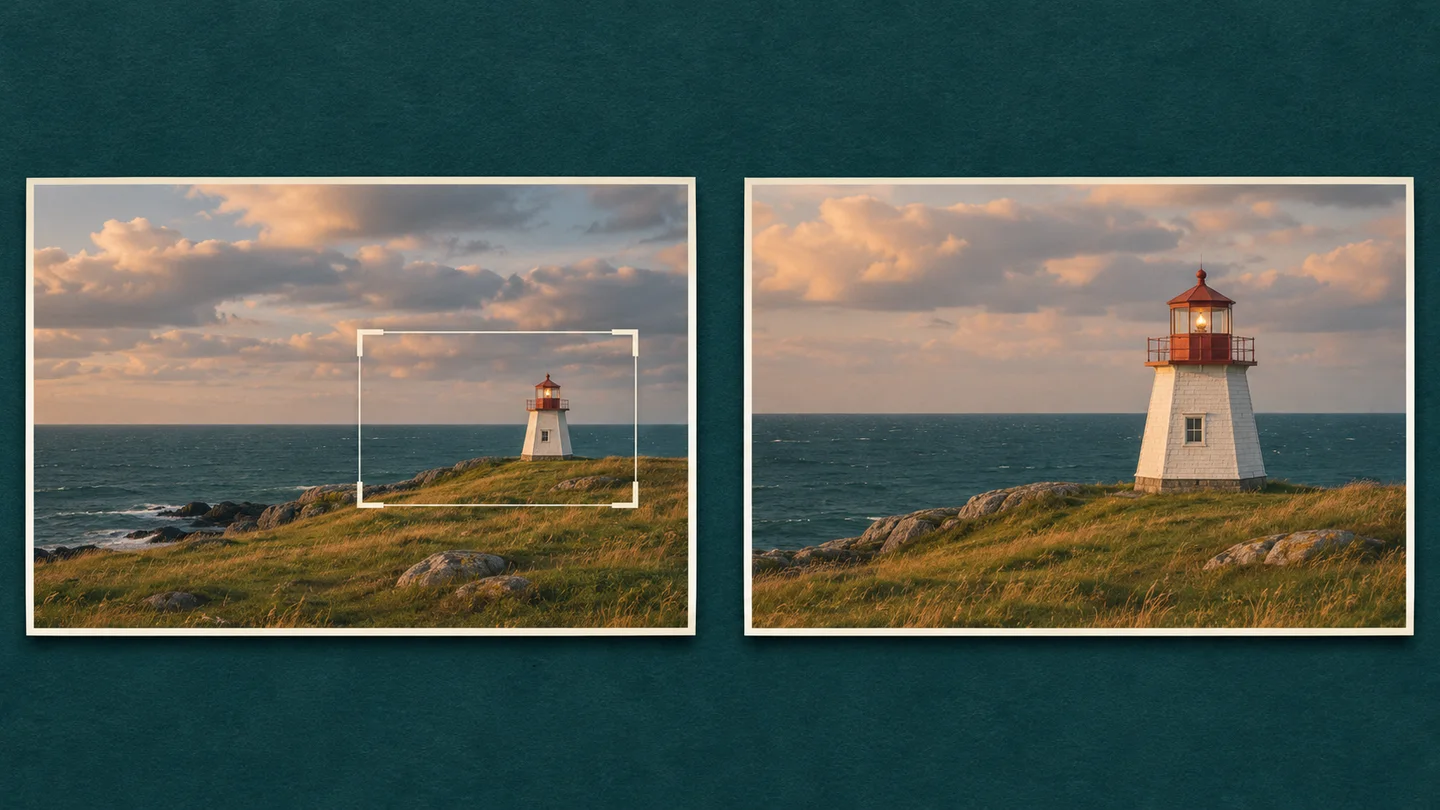
Decide how much room the poster gets in the game. For this waiting room, a panel 6 studs wide and 4 studs high fits above the bench. Its visible face has a 3:2 aspect ratio. Set your editor's crop tool to that ratio and move the crop over the lighthouse.
Keep a little sky above the lantern and enough land below the tower to show where it stands. If the red roof is hard to pick out when you shrink the preview, trim some open water from the sides. Export the crop as lighthouse-poster.png. A 900 × 600 pixel image is one convenient fit for this panel.
Hang the photo in Roblox Studio
- Use File → Import to bring the cropped PNG into your experience. PNG is a supported image format in the Roblox Studio Importer.
- Add a thin block for the poster, set its size to
6, 4, 0.2studs, and anchor it. Position it against the wall with its broad front face toward the room. - In Explorer, insert a Decal under that block. In Properties, set Face to Front, then select the imported image under ColorMapContent. You can also paste the image's asset ID there. The property names are in Roblox’s decal documentation.
- Start a playtest and walk in through the waiting-room door. From there, can you pick out the lighthouse? Then walk up to the bench and check that the lantern roof and the base of the tower both fit inside the frame.
If the lighthouse looks squat, compare the PNG's width-to-height ratio with the panel's. A decal stretches across its assigned face, so changing the panel to 8 × 4 studs would stretch this 3:2 photo sideways. If the panel looks blank from the bench, walk around it. A poster visible on the back tells you which Face setting to change.
For a row of framed destinations, duplicate the finished panel and swap the image on each copy. Keeping the same 3:2 crop gives every photo the same proportions along the wall.